Learning to remove the transfer case from the 4L60E transmission is tricky but not impossible.
Transfer cases are likely to wear down and break under poor conditions.
This would lead to leaks, poor lubrication, and all sorts of nasty problems that need a quick fix.
So, why not do it yourself to save your transfer case and transmission from doom?
Read this article to find different guides to get the transfer case and the transmission out.
You will find some common 4L60E problems and their solutions to work them out quickly.
How To Remove Transfer Case From 4L60E Transmission [In 6 Steps]
Having a professional mechanic remove the transfer case can be the easiest solution, but it’s also expensive.
There’s no need to invest a ton of money into a service you could perfectly do from the comfort of your home.
Don’t fear putting some elbow grease into your vehicle.
This way, you’ll get to know it much better and feel accomplished.
The first thing you need is confidence in yourself.
Without confidence, you can’t do it all by yourself.
Be confident first, and we will guide you through the DIY methods.
Don’t worry; we’ve got you.
So, here’s the how-to guide on how to remove the transfer case from the transmission in 6 steps.
01: Removing the Driveshafts
The driveshaft remains in place on the rear pinion due to two straps with four bolts (11mm).
If the driveshaft looks stuck in the pinion yoke, apply penetrating oil and use a large screwdriver to get it out.
Alternatively, use a pry bar, which will be enough to take out the u-joint.
The front shaft is a bit different.
A boot from the transfer case likely holds it in place.
Work on the band that secures it in place, and pry it off.
Then, unbolt the front shaft from the front differential.
This will allow it to come loose from the transfer case.
02: Draining transfer case fluid
Most transfer cases work with a drain plug, making the job easier.
Find the 18mm bolt on the lower area of the transfer case and let the fluid drain.
Tip: Take the fill plug out first before draining.
It’s not commendable to empty the case first because there may not be any way to fill it back.
03: Removing the Sensors (All of Them)
Check around the transfer case’s rear to find all the sensors you must remove.
These come with classic snap-in connectors, which are a breeze to remove.
04: Removing the Linkage (Only for 4×4 Shifter)
Transmissions with a manual 4×4 shifter or selector require you to remove the linkage responsible for engaging with the transfer case.
For units with electric controls, this step is not necessary.
05: Unbolting the Case
Start removing the bolts that hold the transfer case to the transmission’s back.
The most efficient method to do this is by using a ratchet wrench.
It will fit into the tight spaces perfectly, and the six bolts (15mm) will come off easily.
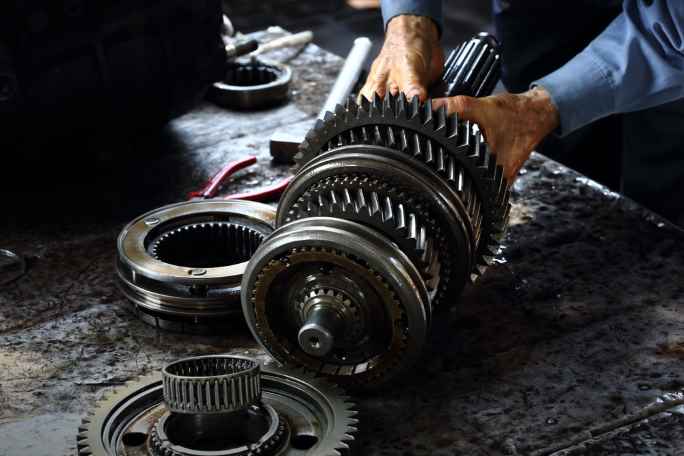
06: Removing the Transfer Case
Removing the transfer case may be tricky for trucks with torsion bars and cross members already in place.
Try to back the transfer case as much as possible from the trans tail and place it down.
Tip: Removing the transfer case from the 4L60E transmission isn’t hard, but caution is still necessary.
Get help if you must to prevent dropping something.
Here’s a visual example of how this process goes.
Use it for reference and apply the concepts to your vehicle.
08 Common Problems With 4L60E Transmission
The following list contains common problems often encountered with the 4L60E transmission.
In many of these scenarios, removing and rebuilding the transmission is the quickest solution.
Now that you’ve learned how to do it, you’re ready to tackle these issues like a professional.
Have a look at 08 common problems-
01. The transmission shifts manually but not automatically
Several factors, like the PCM, wiring, and sensors, could lead to this problem. Check them thoroughly.
02. Slow or no reverse at all
Potentially caused by worn-out “lo-reverse” clutches, fluid leaks, or broken sun shell.
You can fix leaks in reverse apply circuits by adding a high-viscosity additive.
For worn boost valves, you can replace them in the pan.
03. Delayed or hard 1-2 shift
Check the TPS and confirm whether there’s a linear electrical response across the motion range.
If that’s not the case, replace.
04. The transmission doesn’t go to 3rd or 4th gear
This one’s easy: just remove and rebuilt the unit.
You can still drive the vehicle in 2 until you solve the problem.
05. Grinding noise in 2nd gear
Take a look at the sun shell, which may have fractures.
Remove and rebuild to solve this issue; don’t drive the car until you do so.
06. There’s no shift to 2nd or 4th gear, just 1st, and 3rd
Again, you may be dealing with a fractured sun shell or perhaps sheared-off splines.
Like before, the solution is to remove and rebuild. The car is not safe to drive.
07. 1st and 4th gear not available, with the transmission shifting from 2nd to 3rd automatically
A troublesome problem is caused by either a Shift A solenoid failure or PCM-to-Trans wiring issues. Run a diagnostic test.
08. Awful noise while in 4th gear, with the brakes feeling like they’re on
Cause: applying overrun clutches caused by cracks or leaks in the forward piston.
Remove and rebuild the transmission to solve it.
FAQs
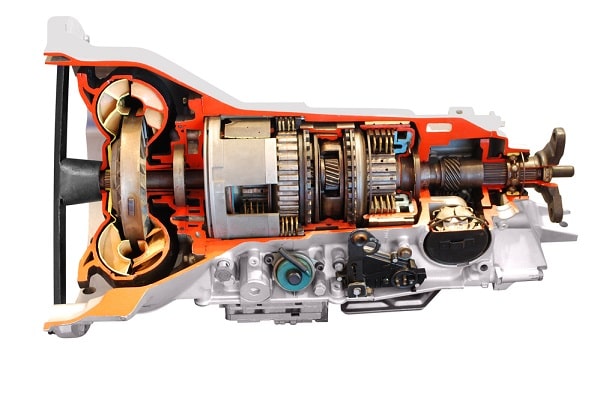
What is the transfer case?
The transfer case is an essential part of the drivetrains in axle-powered vehicles, like four-wheel-drive and all-wheel-drive.
This part has a simple yet important function: transfer the transmission power to the front and rear axles.
To do that, it uses the driveshafts as mediums.
What problems do transfer case failures cause?
The vehicle will likely shift to and out of four-wheel drive automatically.
As mentioned before, a failure in the transfer case keeps the internal parts from receiving lubrication.
It may be a mild inconvenience at first, but the vehicle will eventually stop working as well as it once did.
How often do you have to change the fluid in the transfer case?
The recommended time to change transfer case fluid is every 30,000 miles.
This is super important for tow vehicles and cars that operate in four-wheel drive regularly.
Why change transfer case fluid?
The differential may suffer failures when the fluid is low or gets contaminated.
This is why periodically changing the transfer case fluid is a must.
If you do, the transfer will continue to work properly without any loss of power that would compromise the engine or the vehicle.
Does a broken transfer case make the car useless?
If the transfer case breaks, the four-wheel-drive option won’t work properly.
This is because leakages in the seals allow fluid to escape,
which won’t allow proper lubrication of the interior components.
As a result, the parts inside wear out and are prone to overheating.
Can you fix a damaged transfer case?
You can fix a damaged transfer case by completely rebuilding the system.
This option is friendlier than paying a professional because it isn’t as expensive.
Plus, you won’t have to buy a new one either.
How To Remove 4L60E 4×4 Transmission?
Many people ask a common question in many forums, how to remove 4l60e 4×4 transmission?
Removing the 4L60E 4×4 transmission involves many steps,
like disconnecting the battery, lifting the vehicle, and removing the starter.
This process can also take a considerable amount of time, which is why preparation is key.
Luckily, I found a video that made the removal much easier when I had to do it.
You can check it out here.
Final Thoughts
With this information, you can now remove the transfer case yourself.
Each vehicle is different, so keep that in mind during the process.
Use the information shared here as a reference but know that some of it may be different depending on the car model.
So, there you go! Prepare yourself mentally, make accommodations for the vehicle, and get to work.
Save yourself considerable money by putting some elbow grease and dedication into your car.
We wish you all the best for removing the transfer case yourself.